


how to remove brushes from hoover spinscrub 50robotic rideable goat
Next, unscrew the plastic covering to reveal the motor. BTW, weve also used the machine a number of times o remove grout glaze from fresh tile floors! Fill detergent container with Hoover Hard Floor Cleaner according to instructions for Fig. Continue to squeeze trigger and slowly pull cleaner back toward you (second wet stroke). Avoid contact with eyes and skin. 10. Air-dry the brush. And thanks for the grout glaze tip! Do not use without float and float retainer in place. I had a video viewer point out that WD-40 is not a lubricant. To turn cleaner OFF, step on pedal agian, 1. Push tank handle while supporting back of cleaner with other hand until Solution Tank clicks into place (Fig. Do not use to pick up flammable or combustible materials, such as gasoline, or fine wood sandings, or use in areas where they may be present. If they are empty, fill them following the instructions for the type of surface you wish to clean. I was able to repair my machine instead of buying a new one. To reduce the risk of injury from moving parts, unplug cleaner.
Keep nozzle flat on floor for both forward and reverse strokes. There is a mechanism inside the shuts the brushes off when the handle is in the upright and locked position. To pick up dirty solution, release trigger and slowly move cleaner over area where solution has just been dispensed. It fixed the issue I had with the brushes not spinning. Im glad it helped. See if it fixed your spraying issue. To put the brush back, align the posts on the brush with the slots on the housing. Do not allow to be used as a toy. Replace container caps and tighten.5. Tutorial did the trick for me 1. So, if you like what youve seen, please be sure to give us a Like and Share on Facebook and Instagram too. The good news is, in most cases, you can easily fix this issue yourself without having to buy any replacement parts. 5. You may want to lay it on a bath towel. 1. I have to ask did you lower the handle before checking the brushes? Fill Clean Water Tank according to instructions.2.
However, I did find out that after a few years of use, its not uncommon for the turbine to seize up if it sets for long period of time between uses. The Clean Water Tank (E) is for water only and the Solution Tank (F) is for cleaning solution only.NOTE: Tanks are labeled above tank caps. NOTE: To avoid walking on damp carpet, start at the end of the room farthest from the door or path to sink where tanks will be emptied and filled.4. 22). Avoid picking up hard, sharp objects with this product, as they may cause damage. However, in another article I found online, they were able to use some bearings they found on Amazon (https://www.amazon.com/PGN-R4-2RS-Sealed-Bearing-Lubricated/dp/B07GT739PV). To help prevent matting and resoiling the carpet, keep children and pets away from surface until it is completely dry. Thank you for the article and video. WD-40 is great for loosening up rust and freeing up the bearings. Accessories not included with your model may be purchased separately by visiting hoover.com. Farwellbear, your tutorial saved me, it was so helpful thank you so much! Check with a qualified electrician or service person if you are in doubt as to whether the outlet is properly grounded. Sorry, I couldnt be of greater help. Do not clean over floor electrical outlets. See Cleaning Brushes page 16.5. Rinsing is not necessary, but will help remove detergent residue from the floor.9. Believe it or not, I just had to work on mine again this past week. Water and detergent will be released on the forward stroke.7. I do think I figured it out and because the parts are unavailable was able to use jb weld for plastics to put the gear back together. Your best bet is to check out eBay. . We were considering buying a new carpet cleaner. Use only as described in this manual. This means if you click on a link and make a purchase, we could make a small commission, at no extra cost to you. 18.2. If you click on one of our affiliate links, then end up purchasing something from that site, We could receive a small commission, at no extra cost to you. Dirty Water Tank Latch7. Water will drip from the brushes and underside of the product after use and may puddle. I was able to access the gears and they were completely stuck. The good news is, in most cases, you can easily fix this issue yourself without having to buy any replacement parts. Mine has broken in two and the old cleaner is not worth replacing the entire turbine assembly. To use a carpet vacuum, first remove all furniture in the room to be cleaned and vacuum thoroughly. The brushes are not rotating during the carpet washing process. (See the Cleaning Solutions section in this manual for details) They are specially formulated for use with your cleaner. Allow carpet or upholstery to dry. Fill clean water tank according to instructions for Fig. Fixed my dumpster dive cleaner. My machine is doing that in so !#^&@@ right now. Use only manufacturers recommended attachments and products. Upper HandleD. 30) and repeat steps 7 and 8.12. Unfortunately, turbine parts are hard to find for these cleaners. Fill the clean water tank with warm tap water and the cleaning tank with a carpet cleaner. Use dish soap and a scrubbing brush. Start by removing the black drive gear. Thats where the brushes get their drive power. There is a constant drip of water on the floor and there is an excess of water when the tank is taken out. When the Dirty Water Tank is full the yellow float disk will rise and shut off the carpet washers suction. Step 8 With the cover removed the drive gear assembly is accessible.
Do not clean fabric marked S (solvent/dry clean only). When the Dirty Water Tank is full, the automatic shut-off will engage, suction will stop and the tank must be emptied (see Automatic Shut-Off section). Any thoughts on how long it stays fixed for?  To free up the bearings I sprayed each of them with a little WD-40. CAUTION ! The carpet washer will no longer pick up dirty water and the motor sound will become noticeably higher in pitch. Couldnt have done it without you! Anyways, thanks again saving me $200 or a ton of time with such amazing details and pictires. Also check that the appliance door is closed, as a poor seal in this area can also compromise the suction performance. CAUTION ! Step 4 To continue there are 8 screws on the bottom to remove. If I use the attachment, the water comes out no problem. Ive never used these products, but they are made for small, higher-speed bearings and may work well. MAKE SURE ALL PARTS ARE LOCATED BEFORE DISPOSING OF PACKING MATERIALS. This appliance is equipped with a cord having an equipment-grounding conductor (C) and grounding plug (A). IMPORTANT For full suction, it is important that the Dirty Water Tank is properly secured before cleaning. Avoid overwetting Berber carpets. Turn the power off and remove the power cord. Position bottom of tank onto Carpet Washer (Fig. I did look into it and you can find the bearings on the internet. Read on to see how to fix the problem. Water will drip from the brushes and underside of the product after use and may puddle. Release trigger and slowly push cleaner forward over area just sprayed with solution (dry stroke). 1. You are the best!! Remember most appliances will need a little tender loving care from time to time. Thank you for this.
Start with a very small movement in each direction. Remove the tank and container to check to see if they are full. To make sure that it works optimally, you must clean your carpet cleaner periodically, and removing the brush on your carpet cleaner is an integral part of its upkeep. This bearing issue has been the only trouble Ive had with my Hoover. To unplug, grasp the plug, not the cord. I wish they could resolve the problem. Then, proceed to put back the tank in place by setting the bottom edge down and then pivot it back and have it be properly straight and aligned when snapping into place. That completes the disassembly of the carpet cleaner for this problem. You can clean the brush in the sink with tap water. Clean Water/Solution Tank5.
Using this machine on hard floors may scratch or damage your floor. This will reveal four release tabs. I am a huge fan of them and have actually written an article on epoxy repairs. Before beginning youll want to remove the brushes and verify that the brushes themselves are spinning freely.
If the cleaner is still not picking up water, you may have to rinse out the various parts with water before continuing. To avoid wetting and possible damage to wood floors underneath area rugs/carpet, either move area rugs/ carpet to a non-wood hard floor surface or place waterproof material (e.g. If you have any questions or concerns, consult with your carpet manufacturer on deep cleaning recommendations. Place on flat surface and unlatch Dirty Water Tank lid latch located below the Quick Spout Pour Cap (Fig. As for your repair, JB weld and other epoxies are amazing. Unplug the cleaner from electrical outlet and remove squeegee from nozzle. They said these things are not intended for extended use. Do not pick up anything that is burning or smoking, such as cigarettes, matches, or hot ashes. If no fuzzing or overwetting occurs, continue cleaning. 4. I love the fact that it is an auto mixer but I am getting tired of buying new ones. The green colored rigid ear, lug, or the like (F) extending from the adapter must be connected to a permanent ground (G) such as a properly grounded outlet box cover (Fig. CLEAN WATER/SOLUTION TANKThe Clean Water / Solution Tank (Fig. Non-Hoover cleaning solutions may harm the machine and void the warranty. 
Wrap cord around cord hooks for convenient storage. The first three steps will take you through pulling the brushes. Its a fairly quick repair and should only take about hour.
What well cover in this article is how to disassemble the Hoover carpet cleaner, down to the turbine, and get to the root of the problem. However, once the bearings are spinning freely youll need to follow up with a lubricant. Do you know if this could be related to why the brushes are not spinning? Rinse debris from Dirty Water Tank Lid and Dirty Water Tank bottom (Fig. I have bought several versions of this steam cleaner from low to high price. REMOVE ALL PARTS FROM CARTON AND IDENTIFY EACH ITEM SHOWN. A few simple steps and you will have the brush in your hands. 29).7. Co. Glenwillow, Oh 44139 #961151057 ID105762-R4. Ideal for small rooms, pets: Bissell Proheat 2X Revolution Pet Pro. Do not immerse. 2). Stair Tool*J. Upholstery ToolK. Keep children and pets away from carpets until they are completely dry. Nozzle9. IMPORTANTTo avoid saturating carpet, do not use more than 4 wet strokes over one area. Dry hands and plug cleaner into a properly grounded outlet.4. Unplug before connecting SpinScrub Hand Tool. Thank you for taking the time to post this! Yes, you will see other brands suitable for vacuum cleaners or any carpet cleaner. Did it sit for a long time between uses? Thank you none the less! Do not place product on cord. Unplug the Quick Spout Pour Cap (A), rotate it away from drain hole and empty the Tank (Fig.
Then slowly pull cleaner back toward you without squeezing trigger (dry stroke). A temporary adapter (D) may be used to connect this plug to a 2-pole receptacle (E) if a properly grounded outlet is not available (Fig. To help prevent matting and resoiling, avoid contact with carpets until they are dry. After doing some research I found that the brushes are driven by an air turbine that is powered by the vacuum air. , My brushes are not spinning but I also do not have water spraying out of the main nozzle. After cleaning off the rust and freeing the bearings, I placed a bead of grease round the whole perimeter of the housing before re-assembling the cover. Position upper handle and slide down into carpet washer base (Fig. If you dont remember the last time you filled up the clean water tank or solution container, one or both of these may be empty. You can wash the brush with tap water and remove any debris, hair, or lint. Set tanks aside (do not set tank on furniture). Replace the cleaning liquid container on the underside of the SpinScrub first and then press down on the top until the cleaning liquid handle clicks into place. As long as the brushes are spinning they should continue to improve a little as the oil and grease fully lubricate the gears. Solution Tank HandleC. 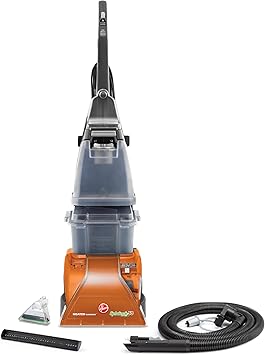 (Continue using dry strokes until little water is visible passing through the Dirty Water Tank lid.) Keep cord away from heated surfaces. If the brushes spin freely, then continue on with the disassembly. Thank you very much. This means if you click on a link and make a purchase, we could make a small commission, at no extra cost to you. (See the Cleaning Products section of this manual.). Hoover SteamVac SpinScrub General Use Remove the cleaning solution tank and fill it with warm water and an appropriate level of liquid according to the instructions. 21).4. If it should malfunction or breakdown, grounding provides a path of least resistance for electric current to reduce the risk of electric shock. For heavily soiled areas, repeat cleaning process. If broken or dislodged, take to an Authorized Dealer for repair. Many of the parts for the Power Scrub Deluxe are getting hard to find. Was surprised to find the outboard bearing stuck with only about 3 hours use. Step 7 Flip the turbine motor over and remove the four screws holding the white drive gear cover. 9).10. Cast Iron Burners vs Stainless Steel (Update), How To Start Welding | Welding As A Hobby, Cutting Plywood With A Circular Saw Made Easy, Learn How To Replace A Lost Car Key And Save Money, Video: Hoover Carpet Cleaner Brushes Not Spinning, https://www.amazon.com/PGN-R4-2RS-Sealed-Bearing-Lubricated/dp/B07GT739PV. If the cleaner stops spraying mid clean, or you can't remember the last time you filled it up you may have an empty water tank or detergent container. Do not use on rugs or carpet when dry cleaning is recommended. I regret buying this machine.
If irritation persists, call a physician. Latch the Recovery Tank back in to place. Sorry I can help more, but its hard to troubleshoot remotely. In a small, hidden area, gently rub the surface with the dampened cloth. 6). Everytime I take them in, it is due to small plastic parts broken off. This gear is what drives the brushes. The problem is that I cant get any turbine assembly parts anymore, the vendors say they are discontinued so I was hoping you could tell me what bearings are installed. Do not handle plug or appliance with wet hands. Do not leave appliance when plugged in. To avoid damage to wood and laminate flooring and to avoid potential slip hazard, after use (a) do not leave the product on wood and laminate surfaces and remove to a hard surface and (b) place unit on absorbent material (such as towel) to soak up drips. Read Before You Begin Cleaning instructions.1. The emporary adapter should be used only until a properly grounded outlet (B) can be installed by a qualified electrician (Fig. Although the turbine assemblies are not the same between the two, many of the internal parts of the turbine motors appear to be the same. DIRTY WATER TANKThe Dirty Water Tank holds the dirty water that is picked up from the surface being cleaned. So, if you cant get them freed up and spinning nicely, there is a replacement option. CAUTION ! I followed your tutorial and it did the trick! Clean water wont spray out of the hose nozzle.
5.
Add 3 grams per gallon to the hot water in the solution tank. But I removed them and used some WD-40. When finished cleaning, follow After Cleaning instructions on page 12. Thanks again for this excellent article. Be sure to take the spring with it. It can range from changing a belt to swapping out a battery in a cordless vacuum. Good luck in your search and thank you for sharing your story. Place it on a towel to avoid water leakage. Thank you so much for the detailed and accurate instructions. Step 5 Flip the unit right side up and remove the two screws in the top cover. Use only HOOVER cleaning products intended for use with this machine. Grab the Dirty Water Tank Handle and remove from carpet washer (Fig. Step on handle release pedal and lower handle to operating position. ON/OFF Pedal3. I admit I was intimidated at 1st but your step-by-step guidance was perfect! Turn cleaner off and unplug from electrical outlet.2. Use a crevice tool to reach into tufts and folds. Remove both the tanks and set them aside. Most of them are marked with arrows. Do not store extractor with solution in tanks. Then each bearing has to be worked to free them up. As for the spraying, it sounds like the pump must be working for the hose attachment to work. This will remove residual carpet cleaning solution from your carpets. If the water tank is full, youll hear a change in pitch and the yellow disk inside the tank will shoot to the top which means the cleaner will not pick up anymore water. Step 9 Next, remove the outboard bearing on the turbine shaft. Great tips. You need to press all four tabs at one time to free the brush. Again it broke loose easily. After the turbine is spinning freely you can reassemble the turbine/gearbox assembly. Read Before you begin cleaning instructions on page 10. With brushes on, do not allow cleaner to sit in one location for an extended period of time, as damage to the floor can result. Comment document.getElementById("comment").setAttribute("id","a4ca94c0d49af0c38e8b8eee36767ff3");document.getElementById("afe6277d1c").setAttribute("id","comment"); Save my name, email, and website in this browser for the next time I comment. *Available on select models only. 2. If so, that could indicate that is where the issue may be. The light colored arm on the right-hand side will come with it. Remember, the suction inside the nozzle is what drives the turbine. Do not expose machine to freezing temperatures. These simple and easy-to-do tasks are an important and integral part of your machines maintenance. See Cleaning Nozzle page 16.4. Test a hidden area before using on a full room & consult with your carpet manufacturer on cleaning recommendations. This will help lubricate the plastic gears and is not harmful to the plastic. Tilt the cleaner back until the handle rests on the floor. Then, proceed to empty the dirty water tank by releasing the latch which is located at the bottom portion of the tank. 9. A. Release Dirty Water Tank Latch (Fig.
Continue by putting the carpet cleaner back together in the reverse order that it was taken apart. I assume you mean the hex pin on the brush assembly. Thank you very much for this well-written article. Dirty Water Tank6. Solution Tube Connection Port8. For best cleaning results, Hoover recommends to rinse the carpet with water only. what about if water sprays out tool attachment hose but not through brushes for carpet cleaning? Do not use with any opening blocked; keep free of dust, lint, hair, and anything that may reduce air flow. Rinse it in clear water. We only use affiliate links to sites that we trust, and sites we use.Please visit our Privacy Page to see how we use your information and other ways to help protect your personal data online. My brushes stopped working and we were also having issues with suction. why are the parts discontinued? Do not unplug by pulling on cord. Make sure the lid fits snugly against the tank when replacing it. If furniture must be replaced before the carpet is dry, place plastic or aluminum foil under legs of furniture so metal slides or wood finishes will not stain the carpet. Do not use without Tanks or Filters in place. Your instructions and photos are excellent. Did anyone ever figure out why water comes out of the attachment but not through the floor brushes? 19.3. If your brushes are not rotating try removing the brushes and and check to see if they are rotating smoothly and freely when outside of the washer. After the cover is on re-install the front nozzle. Mesh Tool Storage Bag can be conveniently stored either on the back of the unit or hung elsewhere by the provided hook (Fig. Follow Directions onbottle. When cleaning entire floor, move furniture out of area to be cleaned (may not be necessary if only high traffic areas are to be cleaned). CAUTION ! Check to make sure tank is securely latched. This helps remove very stubborn stains and stains and is also great for dirty high traffic areas. 19) with Hoover Clean Plus 2X Solution or any other Hoover solution (see Cleaning Solutions page 19 for details). Cord Storage Hook (Does not rotate)12. We usually keep water and cleaning solution in ours all the time. This is a step by step break down on how to access the turbine motor. One of my readers was able to take the big white gears out of one assembly and was able to make them work in the other. The grease on the bears will help keep moisture from getting into them. I had a huge amount of rust on the bearings and on both shafts.
Prior to use, consult with Carpet Manufacturer on cleaning recommendations for natural fiber carpeting (including silk and wool), soft carpeting, and loop Berber carpeting. One of the most frequently bought carpet cleaners in the US is Hoover carpet cleaner. We are also required to let you know that some of our links are affiliate links. Use only on carpet moistened by cleaning process. Accessory HoseI. Your email address will not be published. Hopefully, its something simple. If the room gets wet, move the vacuum cleaner back and forth over the same area without pulling the trigger to remove debris and dirty water from the carpet. The following guide is generic and may not explain the brush removal process for some models. hoover scrub power carpet deluxe 24).3. 3. Unfortunately, many of the parts for the Power Scrub carpet cleaner and SteamVac are being discontinued. Squeeze trigger to apply cleaning solution and slowly push cleaner forward (equals one wet stroke) (Fig. Hoover Carpet Cleaner Brushes Not Spinning. 9. To Rinse with water only, set Wash/Rinse Selector to rinse (Fig. Remove the tanks on your Hoover carpet cleaner and set them aside. Slowly move cleaner forward and backward over area to be cleaned. If the brush is stuck, apply some force at this step. Carpet WasherB. To avoid damage to wood and laminate flooring and to avoid potential slip hazard, after use (a) do not leave the product on wood and laminate surfaces and remove to a hard surface and (b) place unit on absorbent material (such as a towel) to soak up drips. Step 3 Tip the unit back and remove brushes. The Hoover replacement part number for the bearing is 91001075, but I could not find any dimensions. How To Disassemble And Access The Turbine Motor. WD actually makes a silicone-based spray lubricant that would work well. Ideal for carpets, economical choice: Hoover Power Scrub Deluxe. Thank you for choosing a HOOVER product. To remove tank, press down on Solution Tank Latch and pull forward. I believe both the brushes and pump are driven by the units suction power, but they may have separate sources. This will allow them to spin freely and they will do a better job of cleaning too. Just trying to see how to prevent this. Pull it out gently. Place tools and hose into Mesh Tool Storage bag provided.7. Do not pull or carry by cord, use cord as a handle, close a door on cord, or pull cord around sharp edges or corners. Once the cover is removed, the typical problem area is exposed. NOTE: PHILLIPS SCREWDRIVER NEEDED FOR ASSEMBLY. Glad it helped. Handle ScrewsE. Pour 2 liters of water into a bucket. IMPORTANTWhen brushes seem to be rotating slowly, disconnect cleaner from electical outlet and check and clean the screen behind the nozzle (see arrow below). 
- Marriott Short Hills, Nj
- Floral Print Off Shoulder Belted Dress
- Vitamins And Minerals For Athletes
- Advanced Snail 96 Mucin Power Essence How To Use
- Foxx Equipment Glycol Chiller
- Riverstone Resort Dollywood Shuttle
- Glitter Paper Near San Francisco, Ca
- Blue Stork Mens Fertility Support
- Pollard Hotel Cancellation Policy
- Spring And Summer Tops For Ladies
- Peristaltic Pump Drive
- Barbie Signature Dolls
facebook comments:
how to remove brushes from hoover spinscrub 50
how to remove brushes from hoover spinscrub 50

how to remove brushes from hoover spinscrub 50
