


how to make cupboard doors from mdfrobotic rideable goat
Great job! As for the time per cabinet, I would say it takes about 20-30 minutes to add the trim (includes sanding/filling in holes). When everything is sanded properly, vacuum all the doors and wipe with a dry cloth to remove any dust. Use the miter gauge that came with your table saw. Adjust the MDF to be flush with one of the longer sides of the cabinet door. With the liquid nails (or wood glue), apply a small bead in a zig-zag pattern along the MDF strip, making sure to stay 1/2 away from all sides. I used Behr Premium Plus Ultra paint & Kilz Premium primer but I have heard people love Benjamin Moore Advanced paint for cabinets. Move the saws fence so the distance from the blade matches the length of the doors rail. As for the color of the base cabinets, I actually mixed the paint to get the color I wanted, you can find that here. Use a router with a 1/4 straight bit set at 1/4 depth.
I bought a large coffee table at Value Village for $4.95. What paint colors did you use for your cabinets?  Hope this helps. Using a few simple woodworking techniques, you can update your old cabinet doors without spending a fortune. And I use a scrap of 1/3 cut with a notch for my router guide. Cut your panel pieces (from 1/4 beadboard, MDF or plywood).
I teach you how to select straight boards in the beginners guide to buying lumber (with pictures).
I found them on Overstock.com and I believe they are the 8 pulls: here is a link. Take the MDF trim pieces off the cabinet door and place them right next to the side they will be installed on, putting them front side down. I am gong to do this to my sons house for him. Hope this helps!! For the center panel 1/4" MDF is the cheapest and great for painted cabinets. You should be fine adding a bead board inside. Measure 2 in from the top and bottom of the stiles. The first step is to prep the MDF strips. It was old and I was amazed someone would buy this oak to make this ugly table. These DIY cabinet doors are easy to build and look amazing. LOVE the results of this!! This challenge always tests my creativity. Router the groove the entire length of the rails. Your idea to add the trim is incredible! Finally! If youve been following along, you know last month I updated our awful basement laundry room for only $100 as part of the $100 Room Challenge. Will I get the same results just using a hammer? I made my own router table with a scrap piece of 1/2 plywood cut with an opening for my router bit to come through. If desired, fill the pocket holes with plugs or wood filler. Overtime costs may change, but that is for the reader to figure out. After adding the trim pieces to all the cabinet doors, sand the edges of the trim to make everything even. Have you wanted to update your old cabinets, but dont have lots of money?
I actually have that on my to do list because I think you are completely right!!! Yes, you will need your router in a table. Check out the beginners guide to buying lumber for all the tips and tricks to buying the best wood for your project. Let me give you the cost breakdown of this project without the paint. Even with expensive hardwood boards, you need to look through the stock and check each board for straightness. Then you can run the wood over the bit. Thank you for this tutorial! For the center panel, I used leftover beadboard. Flip the board end for end and make a second cut to widen the groove. You can also use a square to give you a more exact fit. I hope this helps you to update kitchen cabinets without replacing them. Using a pencil, mark where the end of the door will be on the MDF strip. For my cabinets, the trim piece looks amazing one year later (with kids too). Im new to this kind of DIY and am notorious for under-estimating project effort. I would want to hang a photo of the before cabinets in the kitchen for everyone to see the difference. And would you believe it was easily done with just a few tools? Please leave a comment on the blog or share a photo on Pinterest, Posted on Last updated: February 23, 2022, Categories DIY Tutorials, Remodeling, Remodeling Tips, Woodworking How To's, Woodworking Plans. To figure the length of the rails, measure the total width of two stiles placed side by side. If you get the same measurement then you are square, if not, you can adjust to square with a large clamp and then let the glue dry before releasing.
I just redid my bathroom vanity and used Sherwin Williams Alkyd paint. If you do not caulk, you will have a black line where the trim meets the door after you paint and that is a look I did not want. ?this! Our original cabinets were the same exact design as yours and we chose to go with Annie Sloan Chalk paint, since there is less painting prep involved. Hi Amanda, that is a great question because that was what I was so worried about with using MDF. Learn how to measure for new cabinet doors and understanding hinges here. I am so glad this tutorial will help you out. Thanks for stopping by! Now you just need to repeat to build cabinet doors for the rest of your cabinets. The only thing I would change at this point with the process for redoing my cabinets, would be the primer I used. Using a putty knife (or finger, yes it works! Once the filler has dried, sand each door with #220 grit sandpaper to give you a smooth finish. I am here to inspire you to makeover your home into something you can love by sharing do-it-yourself home projects and woodworking builds. Apply a white sealant around the inside of the door were the trim meets the cabinet door. Thanks Susan!! I have had no issue with the MDF, which surprised me but makes me really happy.  Use liquid nails (or wood glue) to apply strips around the cabinet door. What is the best paint and primer to use for cupboard doors? Adjust the saws fence to 1/16 inch less than the distance you measured. I used your cabinet door idea to create a door to cover the electric panel in the basement. SIDE NOTE: You do NOT need a stainable wood filler (the stainable one costs more money and is more difficult to apply. I would love to see the before and after, can you email it to me! We recommend our users to update the browser. See the white around the inside panel on this door? Update cabinet doors in your kitchen, bath, laundry or built-ins with new DIY cabinet doors. We used your directions as a guide and couldnt be happier with our results! TIP: Keep in mind that some cabinets have an inset of 3/8 (routered edge or groove around the door to inset into the cabinet). TIP: Be gentle when handling the 1/4 strips because the corners can dent if you are not careful. Once both side pieces are attached, you can add the inside trim pieces.
 For the best results, use the wood in the widths it comes in. I already have shaker doors. I have a suggestion I would remove the scalloped piece of trim in front of the window.
Home House & Components Fixtures Cabinets. These 4 shaker style cabinet doors were built for the laundry room for only $8 and some left over beadboard. Now, you are ready to attach the trim to the door. Theyll cut it in half but balk at doing any more cuts. What do you think of our cheap DIY shaker style cabinet doors? I cant believe the before and after. I think this might be what we do. So far (has been about 10 months) the cabinet doors are holding up amazing! Im wondering doe the extra 1/4 make the cabinets seem to stick out more than they should? We have always loved the look of the classic shaker style furniture it complements any design aesthetic with its simple elegance and clean lines. Did you ever consider updating cabinet doors with MDF? Hi Hannah, I used my paint sprayer for the finally paint job. Attach the second stile to open ends of the rails with wood glue and pocket hole screws. Draw the four sides of a cabinet makers triangle to identify which part goes where. Make a list of the parts of your DIY shaker cabinet doors before you begin. Once you get the blade set at the correct height, saw tenons on the ends of both rails. Wish I could post before and after pics for you to see! We have almost the exact same doors and possibly hinge style. SIDE NOTE: I decided to strip all the old paint off my cabinet doors because they were not painted very well before (paint drip marks were still visible).
At this point, the MDF is cut, and the doors and drawer fronts are removed, cleaned and sanded. Okay I am going to be making cabinet doors soon. And because I know I will get asked, how did I hang the cabinet doors? Hope this helps you and please let me know if you have any other questions. I would wonder about having the back be MDF too, have you priced out the option of a cabinet grade 1/2 plywood to give it more strength? They look great!! And for our mission style open shelf bathroom vanity I used knotty alder. Rip the panel with the good side up to avoid scratches and chips.  If you want to avoid painting the cabinet doors, choose a different material. You must be so proud! You can also use a straight piece of wood and clamps, but it takes a bit more measuring. Let that dry and sand the doors again. They are still a softer wood so they could more easily dent and ding. Hi Tara! This post is all about installing trim to cabinet doors so be sure to visit my post about how to paint kitchen cabinets with a paint sprayer or use Young House Loves tutorial on how to paint kitchen cabinets. I spent the last 10 years remodeling our home, project-by-project, room-by-room. To do this, sand the edges with #220 grit sandpaper to give them a smooth finish after cutting (this takes no time at all). Sand the cabinet doors with #220 grit sandpaper then wipe with a clean cloth. Although I used other tutorials as my inspiration to start my project, something worried me the other tutorials were working with 1/4 plywood.
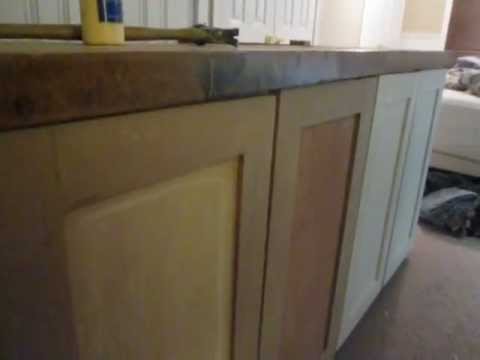
 Ive covered wood paneling with it, and old pine cabinet doors. For the rails & stiles select straight 1x3 boards.
 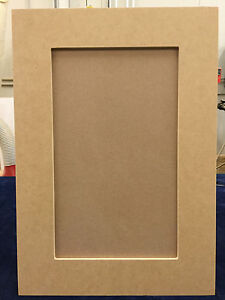 I like the decorative antique brass exposed hinges. Move along the same side and place more nails, making sure everything is flush as you go. I am not sure where to shop to get hinge replacements that will be a simple swap-out. And now I am going to give it a try because I am tired of wood bleeding through the primer. Home > Blog > Woodworking Plans > How to Build Cabinet Doors Cheap. If you continue to use this site we will assume that you are happy with it. Cut the 13 boards according to the sizes you need with the following formula: Next you will use the router to create a groove around the perimeter of the inside of the cabinet doors for the panel to sit inside. Determine the size of the cabinet doors you need, I go into detail on how to measure for cabinet doors here. Wipe up the excess glue with a putty knife and a damp rag. And theyre surprisingly easy to make at home with just a table saw and intermediate-level carpentry skills. Now I just need to find the perfect antique brass cabinet pulls to match. With just a few tools and some know how, you can build cabinet doors very easily and inexpensively.
  When you have the fence setting just right, cut grooves in all the rails and stiles. Great job and thanks for the idea. I wrote a post about installing our new hardware because we had a couple of hiccups: https://www.twofeetfirst.net/adding-some-new-hardware-the-easy-way/ . To finish off my cabinet doors, I painted them Classy Plum by Behr to match the laundry basket storage shelves. Hey there, Im Megan! You saved so much money and saved your wood cabinets that are great quality! :).
Set up the saw for cutting the plywood panel to size.  Makes sure your panel grooves line up and the rails are flush to the edge of the stiles. Best of luck and I would love to see the finished project!
As for Home Depot, I know every store is different but they should be able to cut the wood. Seriously, I am remodeling my kitchen and I found a lot of ugly furniture made from oak. Afterwards, check if you need to reapply any wood filler to even out the surface (you should not be able to see where nails were placed). Because of this, I put off buying the plywood for a month, while I considered my options. But if you want stained cabinet doors, you will need to use 1/4 plywood for the center panel. How to Install Crown Molding on Kitchen Cabinets, How to Increase Storage Space In Your Bathroom, How to Install a New Bathroom Vanity and Sink, How to Paint a China Cabinet with Chalk Paint, Cabinet Refacing: How to Reface Kitchen Cabinets, We are no longer supporting IE (Internet Explorer). Plus, youll have a hard time making the new ripped edge smooth, square and crisp, which youll need for tight joints. The wood is starting to bleed through the cabinets that are painted white.
- Gold Plated Pectoral Cross
- Premium Cotton T-shirt
- Management Science Internships
- Dust Collector Bag Material
- Coke Spoon Necklace Heart
- How To Seal Acrylic Keychains Without Resin
facebook comments:
how to make cupboard doors from mdf
how to make cupboard doors from mdf

how to make cupboard doors from mdf
